When you purchase through links on our site, we may earn an affiliate commission. Here’s how it works.
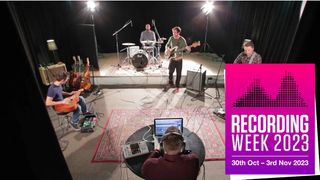
RECORDING WEEK 2023: There are many ways to record your music, and you don't have to be in a traditional studio environment to get good results.
Capturing musicians playing together can reap great rewards in terms of dynamics and practicality, and showcase your band's chemistry together. Here's our 10-step guide to getting started with it…
As well as your instruments and amps, you'll need a laptop capable of running DAW software such as Cubase, or if you're old-school, a multi-track Portastudio. You'll also need an interface that can take multiple XLR inputs; eight would be ideal to cover amps, drums and room mics, too.
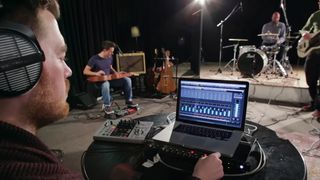
Having a mate to be your engineer can simplify and speed up the process
Because you'll be using mics to record the instruments, 'spill' or 'bleed' is inevitable between them. This is when the instrument on one mic is picking up the sound of another. It tends to happen less with the close mics you'll have on amps, but the drums are a loud instrument and spill from them is likely.
Because of this it's advisable to record your vocals in a separate session rather than have a sensitive condenser mic picking up the other instruments as well. You can minimise bleed between the other instruments by positioning musicians in a semi-circle or horseshoe shape so they're spaced out from each other but still close enough to communicate but amps aren't facing each other where they could cause feedback.
Using a four-mic setup for the drums to capture clean sound, start with the overhead mics first. These capture the sound of the kit being played in the room and help produce a clearer cymbal sound.
Start by positioning them six feet above ground level and aimed down at the kit. It's vital that they are equal distances from the kit to avoid mic phasing (which happens when the sound is hitting each mic at different times).
For the kick drum, the closer you position the mic to the batter head (the side that is hit) the more attack you'll get from the sound. You may also choose to place a pillow inside the kick drum as a muffler to reduce unwanted overtones and help give a punchier, less boomy sound.
For the snare, position the dynamic mic a couple of inches above and an inch from the edge of it. The further you move it away, the more room ambience you'll get. And to reduce the amount of hi-hat cymbal sound hitting the snare mic, make sure it's facing directly away from the hi-hat.

Make sure your overhead drum mics are equidistant to avoid mic phasing
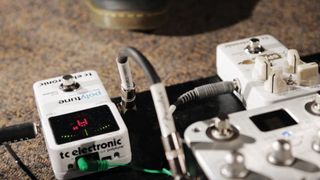
Remember to re-tune between takes - even being a little out can ruin a take
You'll get the instrumental core of your song tracked in the live stage, but to take the pressure off, you may want to save solos for an overdub stage, using amp and effects modelling plugins to nail a take and tone that you're comfortable with.
But you may also choose to overdub parts to really add impact to your song's parts, such as adding ringing overdriven chords in the chorus. Think about how you can enhance it without losing that live energy you've captured.
When recording the live instrumental, remember to keep vocals in mind with your playing dynamics so when you add them, the musicians are already reacting to the parts where vocals will be, such as taking things down a notch with their playing when the first verse comes in.
Total Guitar is Europe's best-selling guitar magazine.
Every month we feature interviews with the biggest names and hottest new acts in guitar land, plus Guest Lessons from the stars.
Finally, our Rocked & Rated section is the place to go for reviews, round-ups and help setting up your guitars and gear.