Precautions
Make sure that there is no obstacle between the remote control and television set.
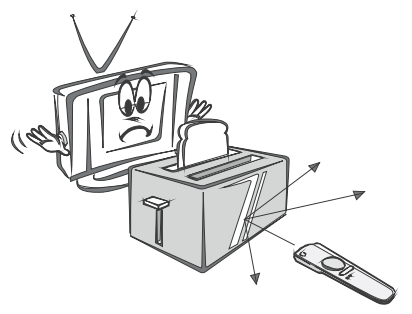
Keep the remote control away from heat sources or humid areas toensure effective performance of the remote control.
As strong light may interfere with the signals, change your position to operate the remote control if the television cannot be turned on or off as you expect.

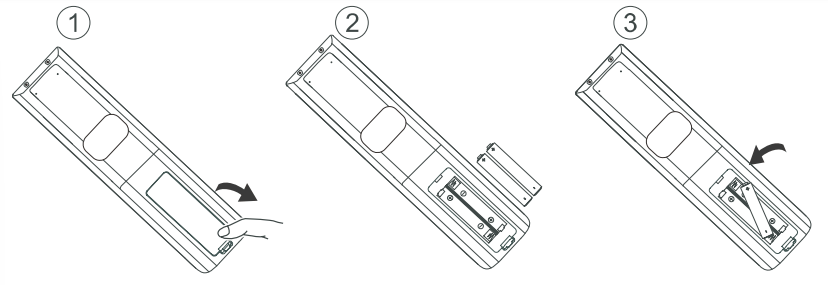
Make sure that two AAA 1.5V alkaline batteries are loaded.The batteries must be installed properly.
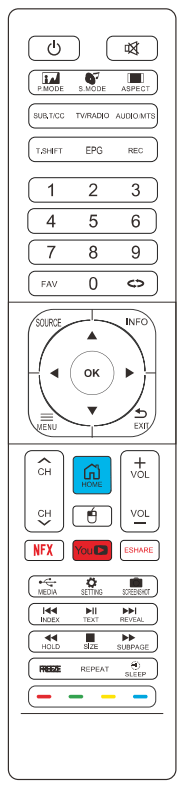

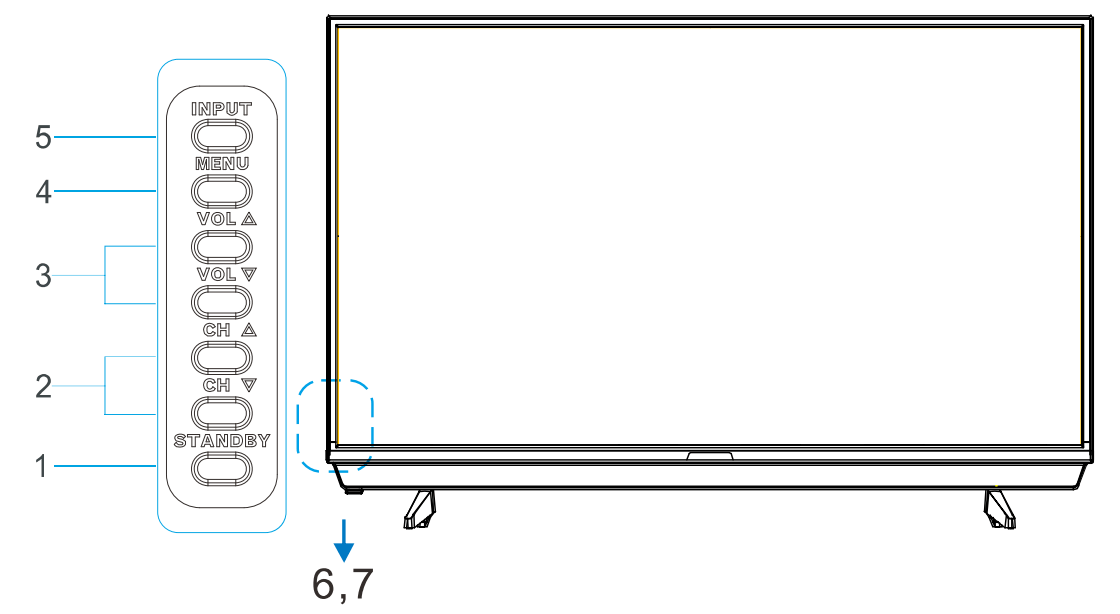
1. POWER: Press to turn TV set on or switch to Standby mode.

2. MUTE: Press to mute sound, press again to restore sound.

3. P.MODE : Press to set the picture mode.

4. S.MODE: Press to set the sound mode.

5. ASPECT : Press to select the aspect ratio.
6. SUB.T/CC Press to select subtitle.
7. TV/RADIO: Press to switch the channel between TV and RADIO.
8. AUDIO/MTS: Press to select Audio.
9. T.SHIFT: Press to activate 'Timeshift' function in Digital TV mode for delayed viewing.
Please note: USB memory device is required for this function.
10. EPG: Press to show the Electronic Program Guide menu.
11. REC: Recording functions for DTV (Digital TV) channels.
Please note: USB device is required for recording.
12. 0-9: Press 0-9 buttons to select a TV channel.

13. : Press to return to the previous channel viewed.
14. FAV: Press to enter "Favorite list" menu.
15. SOURCE: Press to select various input sources.
16. INFO: Press to display the source and channel information.
17. OK: Press to confirm selections.

18. MENU : Press to bring up the main menu to the screen.

19. EXIT : Press to exit the OSD menu (On-screen display)

20. HOMED : Press to display the homepage interface.
21. VOL +/-: Press to increase or decrease the volume.
22. CH+/-: Press to go to the next higher or lower channel.

23. : Press to turn on/ turn off mouse function.
24. NFX: Press to select NETFLIX in Smart TV mode.

25. YOU : Press to select YOUTUBE in Smart TV mode.
26. ESHARE: Press to select ESHARE in Smart TV mode.

27. MEDIA : Press to select MEDIA menu in DTV mode.

28. SETTING: Press to select SETTING.

29. SCREENSHOT : Press to select the camera for a screenshot (only in Smart TV mode).

30. INDEX: Press to display the index of the text.* Press to go to the previous chapter.

31. REVEAL : Press to reveal or hide hidden text.* Press to go to the next chapter.

32. SUBPAGE: Press to open the subpage of the text * Press to play a program in fast forward mode.

33. HOLD: Press to hold the text.* Press to play a program in rewind mode.

34. TEXT: Press to show/hide text * Press to play/pause.
35. SIZE ■: Press to change text size in TEXT mode* Press to stop playback.
36. FREEZE: Press to freeze the screen in DTV mode.
37. REPEAT: Press to repeat play (for USB files).

38. SLEEP : Press to set the sleep time.

39. Colour Buttons: Text edit keys .* Program edit as perthe On-screen Display Menu.
* Teletext functions are not available in Australia.
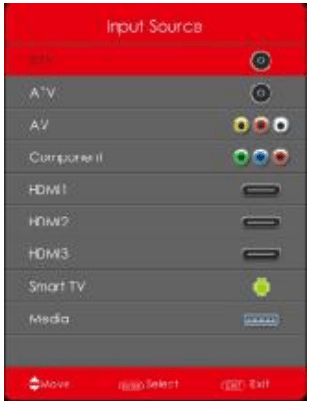
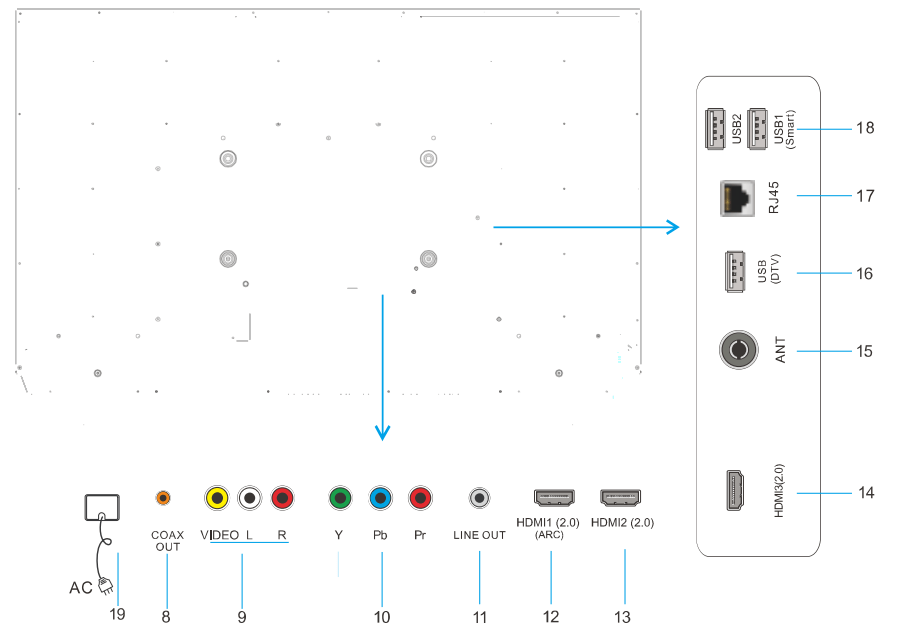
* Press SOURCE button to display the input source list,
* Press ▼ / ▲ button to select an input source:
ATV: Analogue TV AV: 'VIDEO' composite input jack
Component: 'YPbPr' component video jacks
HDMI1, HDMI2,HDMI3: HDMI inputs
Smart TV: Smart TV channel
Media: Media port for file playback from a compatible USB memory device
* Press ENTER button to enter the input source.
* Press EXIT button to quit.
Press MENU button to display the main menu.
Press ◄ / ► button to select CHANNEL in the main menu
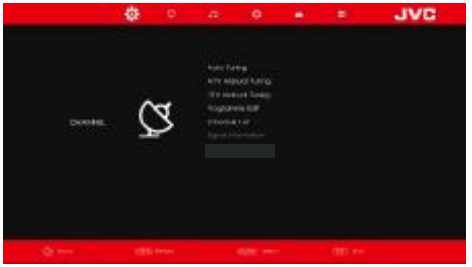
1. Press ▼/▲ button to select the option that you want to adjust in the CHANNEL menu.
2. Press OK button to adjust.
3. After you have completed the adjustment, press OK button to save and return to the previous menu.
Auto Tuning
Press ◄ / ► button to select Auto Tuning, then press OK/► button to enter.
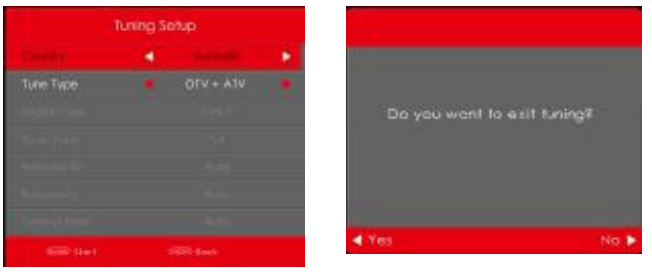
Country
Press ◄ / ► button to select Country .then press OK button to enter.
Tuner Type
Press ◄/► button to select Tune Type, then press OK button to enter. (Available Systems:ATV,DTV,DTV+ATV)
ATV Manual Tuning

Current CH
Set the channel number.
Colour System
Select the colour system
(Available Systems: AUTO,PAL.SECAM).
Sound System
Select the sound system.
Fine-Tune
Adjust the frequency of the channel.
Search
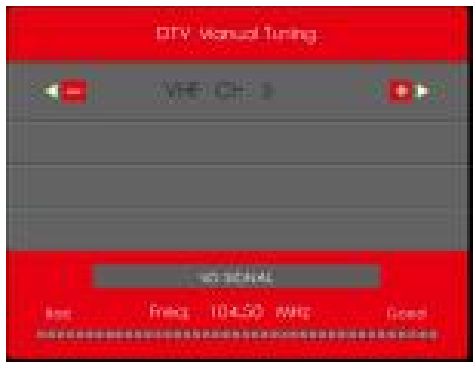
DTV Manual Tuning
Press ▼ / ▲ button to select DTV Manual Tuning, then press OK button to enter.
Program Edit
Press ▼ / ▲ button to select Program Edit, then press OK button to enter sub-menu.
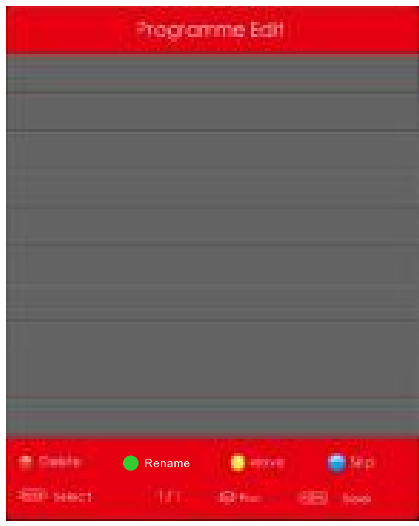

The four coloured keys are shortcuts for programing the channel.
First press ▼ / ▲ to highlight the channel you want to select, then:
Press the Red button to delete the program in the list.
Press the Green button to rename the program in the list.
Press the Yellow button to move the channel in program list.
Press the Blue button to skip the selected channel.
(your TV set will skip the channel automatically when using CH+/- to view the channels).
Press FAV. button to add or remove the channel from your favourite list.
Note: Rename is only available for analogue channels.
Schedule List
Press ▼ / ▲ button to select Schedule List, then press OK button to enter.
Signal Information
Press ▼ / ▲ button to select Signal Information, then press OK button to enter.
Press MENU button to display the main menu.
Press ◄ / ► button to select PICTURE in the main menu.
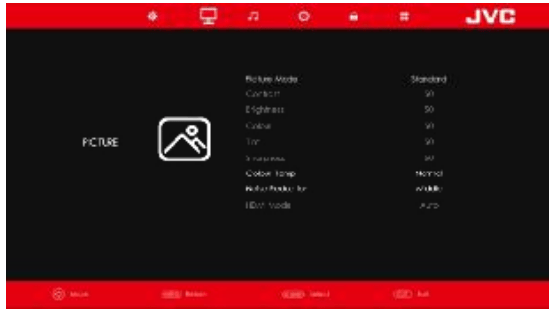
Picture Mode
Press ▼/▲ button to select Picture Mode, then press OK button to enter sub-menu.
You can change the value of contrast, brightness, colour, sharpness and tint when the picture is in PERSONAL mode.
Please note: You can press PMODE button on the remote control to change the picture mode directly.

Contrast/ Brightness/ Colour/Tint /Sharpness
Press ▼/▲ button to select an option, then press ◄ / ► button to adjust.
Contrast: Press to adjust the highlight intensity of the picture.
Brightness: Press to adjust the brightness of the picture.
Colour: Press to adjust the saturation of the colour according to your own preference.
Tint: Press to shift the colour of the picture to compensate for any errors in transmission.
Sharpness: Press to adjust the detail in the picture.
Colour Temperature
Press ▼/▲ button to select Colour Temperature .then press OK button to enter sub-menu.
Press ◄ / ►button to select (Available Colour Temperatures: Cool, Normal, Warm).
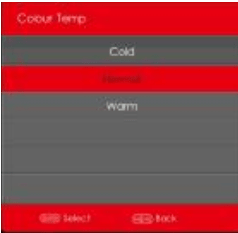
Cool: Produces a blue-hued image.
Normal: Produces a vivid image.
Warm: Produces a red-hued image.
Noise Reduction
Tofilteroutand reduce the image noise and improve picture quality.
Press ▼/▲ button to select Noise Reduction, then press OK button to enter sub-menu.
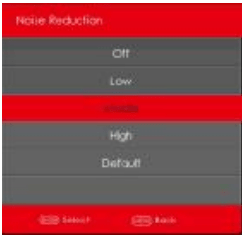
Off: Select to turn off video noise detection.
Low: Detect and reduce low video noise.
Middle: Detect and reduce moderate video noise.
High: Detect and reduce enhanced video noise.
Default: Set as default.
HDMI Mode
Press ▼/▲ button to select HDMI Mode, then press ◄ / ► button to select Auto,Video or PC.
Press MENU button to display the main menu.
Press ◄ / ► button to select SOUND in the main menu.
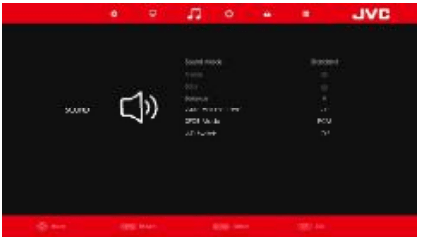

Sound Mode
Press ▼ / ▲ button to select Sound Mode, then press OK button to enter sub-menu.
Press ▼/▲ button to select.
You can change the value of Treble and Bass when the sound is in PERSONAL MODE.
Please note: You can press SMODE button on the remote control to change the sound mode directly.
Movie: Enhances treble and bass for a rich sound experience.
Sports: Enhances vocals for sports.
Music: Preserves the original sound.Good for musical programs.
Standard: Produces a balanced sound in all environments.
Person: Select to customise sound settings.
Balance
Press ▼/▲ button to select Balance and press ◄ / ► button to adjust.
Auto Volume Level
Press ▼/▲ button to select Auto Volume, then press ◄ / ► button to select On or Off.
SPDIF Mode
Press ▼/▲ button to select SPDIF Mode, then press ◄ / ► button to select Off / PCM /Auto. AD Switch
Press ▼/▲ button to select AD Switch, then press ◄ / ► button to select On or Off.
Please Note:
Balance: This item adjusts the speaker’s output enabling you to hear the sound perfectly well in whichever position you are seated.
Auto Volume: This item is used to automatically reduce the difference between channel and programme volume.
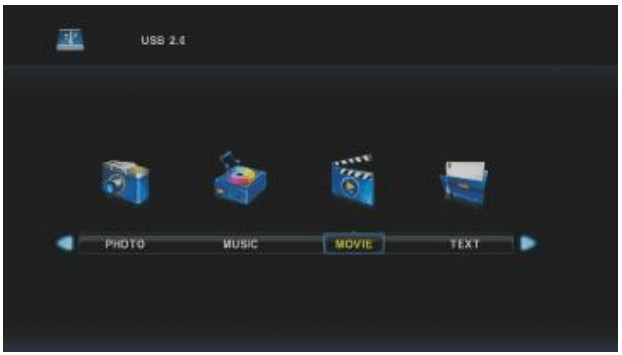
Please note: Before you operate the Media menu, plug in the USB device, then press SOURCE button to set the Input Source to Media.
Press ▼/▲ button to select MEDIA in the source menu, then press OK button to enter.
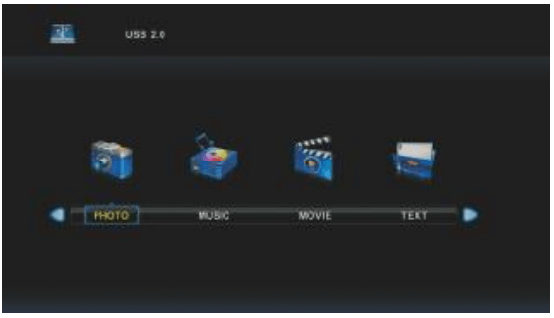
Press ◄ / ► button to select the option you want to adjust in the main Media menu, then press OK button to enter.
Press ◄ / ► button to select PHOTO in the main menu, then press OK button to enter. Press Exit button to return to the previous menu and Exit button again to quit.
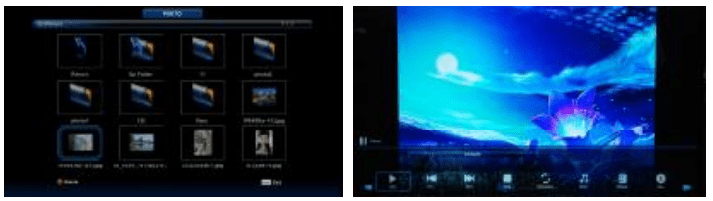
Press ◄ / ► button to select the file you want to watch in the file selection menu, then press media button to display the picture.
When highlighting the option selected, the file information will appear on the right and the picture will be previewed in the centre.
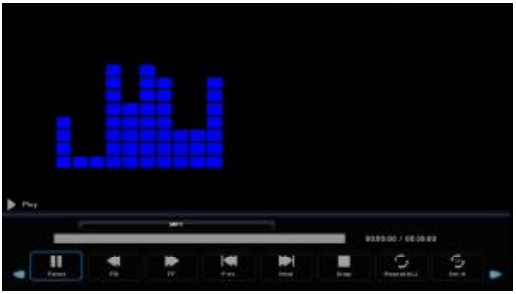
Press ◄ / ► button to select MUSIC In the main menu, then press OK button to enter.
Press Exit button to return to the previous menu and Exit button again to quit.
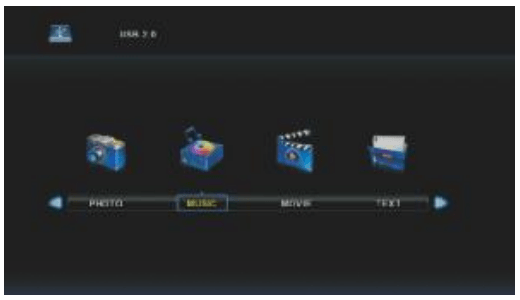
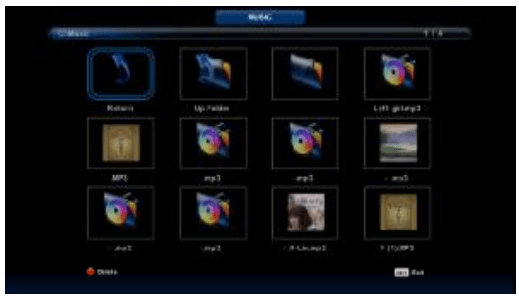
Press ◄ / ► button to select the drive disc you want to listen to, then press OK button to enter. Press ◄ / ► button to return to the previous menu.
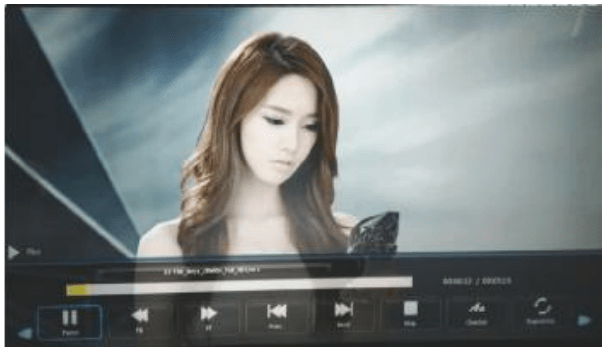
Press ◄ / ► button to select MOVIE in the main menu, then press OK button to enter. Press Exit button to return to the previous menu and Exit button again to quit.
Press ◄ / ► button to select a disc drive to watch, then press OK button to enter.
Press media button to play the selected movie.
Press display button to select the menu at the bottom of the screen, then press OK button to operate.
Press Exit button to go back to the previous menu and Exit button again to quit the entire menu.
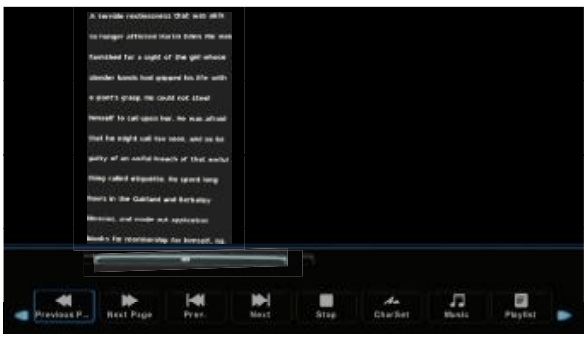
Press ◄ / ► button to select TEXT in the main menu, then press OK button to enter. Press Exit button to return to the previous menu and Exit button again to quit.

Press ◄ / ► button to select a disc drive to watch, then press OK button to enter.
Press ◄ / ► button to select on the next page.
When the Smart TV input is selected for the first time, a Welcome Page will be shown. It will help you to configure the device.
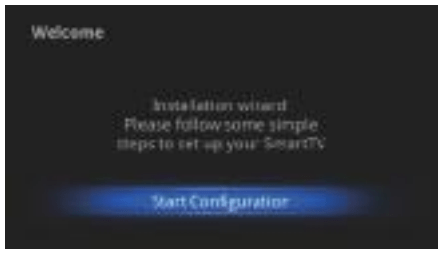
Please note:
If you want to skip this Wizard, press “HOME” key.
If you have completed the Wizard once, it will not automatically open again.
If you want to change any of these settings again, select 'Welcome' from 'All Apps' to run through the options again.
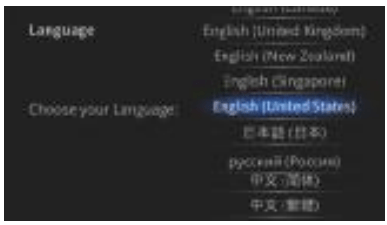
Select language:
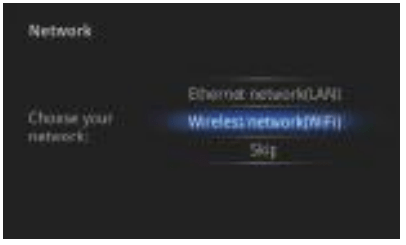
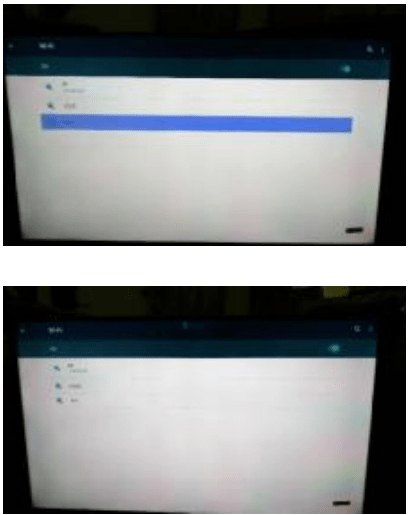
Select network type:
Please note:
If you do not want to choose your network, you can skip this step by pressing “Skip”. You will also find the network settings in “Settings”.
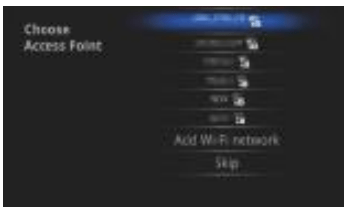
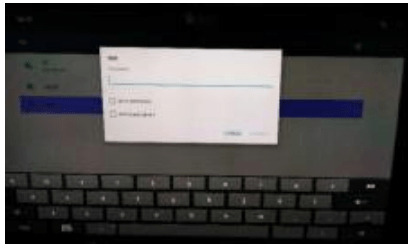
Select Wireless network (Wi-Fi):
Please note:
If you choose 'Wi-Fi', select a Wi-Fi Access Point.
If you choose 'Ethernet', the screen will show Ethernet connection status.
Select Ethernet network(LAN):
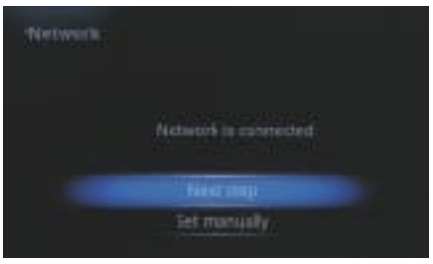
Configure Ethernet manually:
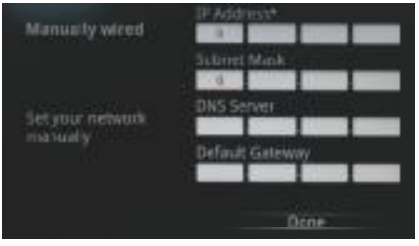
Set up the correct time zone:
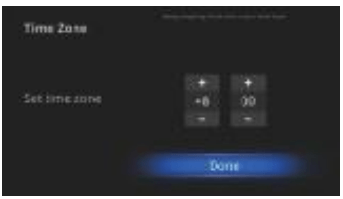
Please note:
If the network is not connected, set the date and time manually.
Set the date /time manually:
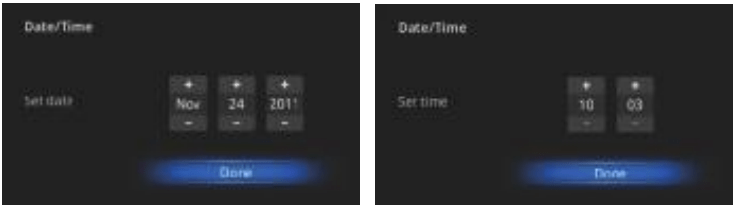
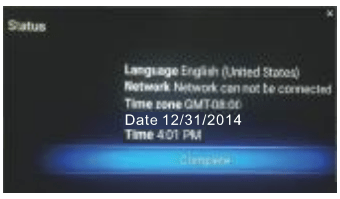
Adjust the screen size using the arrow buttons on the remote control:

Please note:
Users can set the Language, Network, Time Zone,
Date / Time and adjust screen size at this stage.
Main Launcher
In Android mode, press the "Home" button on the remote control to enter the Main Launcher.
Press the arrow buttons ◄/► ▲/▼ to select the desired icon and press “Enter” to enter the sub-screen.
Main Launcher contains:
-Time Information (which can be set via "Settings").
- Function status (which shows Wi-Fi and USB connections - If It Is white then it is working, if it is grey it is in standby mode).
The Browser tab contains bookmarks and a search bar. It allows to browse the Internet.
You can search for information and watch online TV etc.
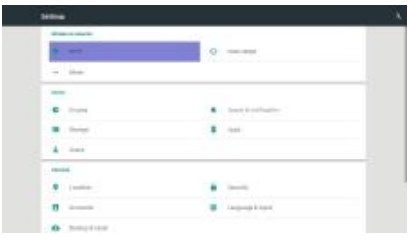
The Settings screen contains most of the customizing and configuration options, such as language, aspect ratio and network settings.
Main Launcher Applications
Install from USB Flash Drive
2. Choose your USB flash drive or any other mass storage folder.
3. Select the desired application from the folder.
4. Press the Install button.
5. You can find the application in the tab “Apps” after installation.
Download & Install from Browser
1. Open the Browser.
3. Download the APK file from the downloaded link
(if you experience problems with downloading, please make sure there is enough space in your internal storage).
Install from App Installer
1. Open the App Installer.
2. Find the application's icon and enter it.
3. Press the install button.
4. You can find the application in the tab “Apps” after installation.
Install from Google Store
1. Open the Google store application.
2. Enter your Google account name and password into the Google store.
3. Download and install.
Unlocking Features for Pre-Loaded Android Apps
Using the remote control as a mouse:
1. Press the “ (5 ” button to turn on the mouse function.
2. Use left, right, up and down arrow buttons to move the arrow around the screen.
3. Use 'OK' button as mouse click (to select).
4. Press the “ (5 "button again to turn off mouse function.
Alternatively, you can connect a standard USB mouse to the TV.

SCREENSHOT
Press to select the camera for a screenshot (only in Smart TV mode). You can find the screenshot file in Internal Memory/Public Memory/Pictures/Screenshots.
PROBLEM
SOLUTION
TV will not turn on
I don't receive all the available channels or am having reception problems
Your antenna may not be sensitive enough or positioned properly, especially if you are using an indoor antenna. We recommend connection to a professionally installed external antenna. Some indoor antennas may work depending on your location to the broadcasting tower, however they usually won't tune all available channels and can produce intermittent reception.
My Foxtel box (or other device) is causing problems with the TV
No picture, no sound
Poor picture, sound OK
Picture OK, Poor sound
Audio noise
I've lost or damaged my remote control
When 1 connect my computer, the outer edges get cropped out
Smart Features Troubleshooting
PROBLEM
POSSIBLE CAUSES
SOLUTIONS
Cannot access any links on the browser
1. Errors in network parameter configuration.
2. Network connection is improper.
3. Network service is not activated.
4. Wi-Fi not connected properly
1. Contact the network administrator to obtain IP address and other parameters.
2. Check if network cable is connected properly.
3. Contact network service provider.
4. Connect to your Wi-Fi network
Cannot download or Install apps
1. Problem with your network connection
2. Trying to install incompatible apps
1. Check your network connection (wired or wireless).
2. Not all apps are compatible with this TV. Some third-party apps may not work properly or may have limited functionality.
Text/ images getting cut off at the edges
1. Screen size not adjusted correctly.
1. Adjust screen size from 'Welcome' option in 'All Apps'. See 'Smart TV Install Wizard' section for instructions.
JVC LT-55N775A | File type: PDF | Filename: JVC LT-55N775A 55″ 4K UHD Smart LED TV with Soundbar.pdf | Size: 6.04 MB | Language: English | Other documents: 2 files.